Construction of a Wooden Barn Door
There is nothing complicated about building yourself a nice looking wooden barn door. Using the technique described below, you'll be able to build any size of door you need.
What Wood to Use:
The best wood to use for door construction is soft wood. Two most popular kinds are white pine and cedar. Cedar is far better choice to use in warm climates and is more termite resistant than pine. Overall, cedar is considered to be better wood, but the price you'll pay for cedar is at least 3 times higher than for regular pine. Whatever wood you decide to use for your door, try to pick nicer boards without cracks, loose knots and bows. If you are building a barn with wooden siding, put nicest boards aside for doors & trims.
The simplest way to build a door is to use 1x10 T&G barn siding for the door and regular straight edge 1x10 barn siding for trims and cross-bucks. If needed, you can substitute 1x10 T&G boards for 1x8, 1x12 or even 2x6 or 2x8 boards. Make sure to get T&G boards for the door itself and regular boards for all of the trims.
Building Door For a Center Aisle Barn
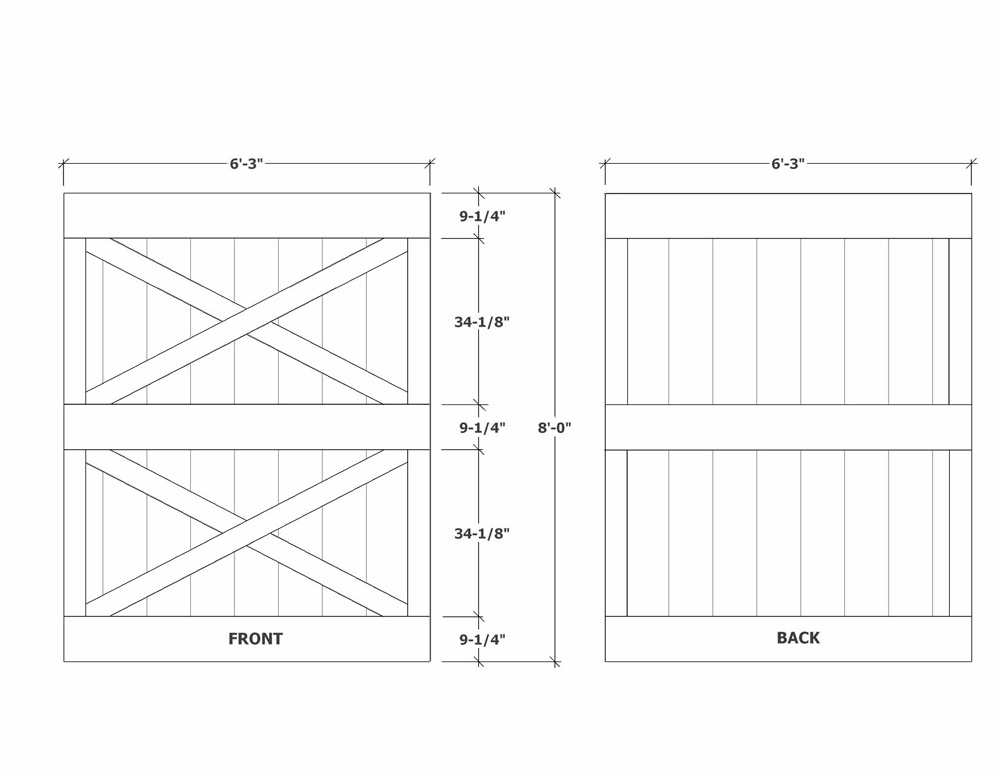
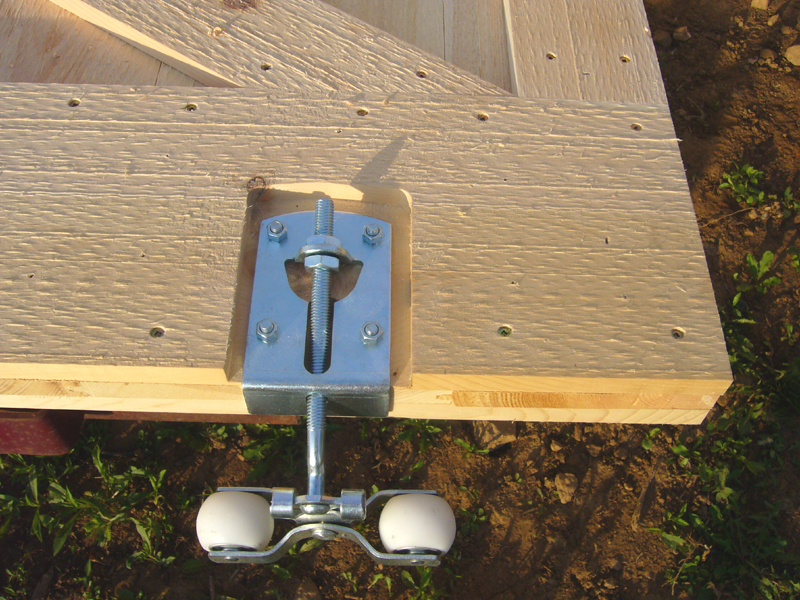
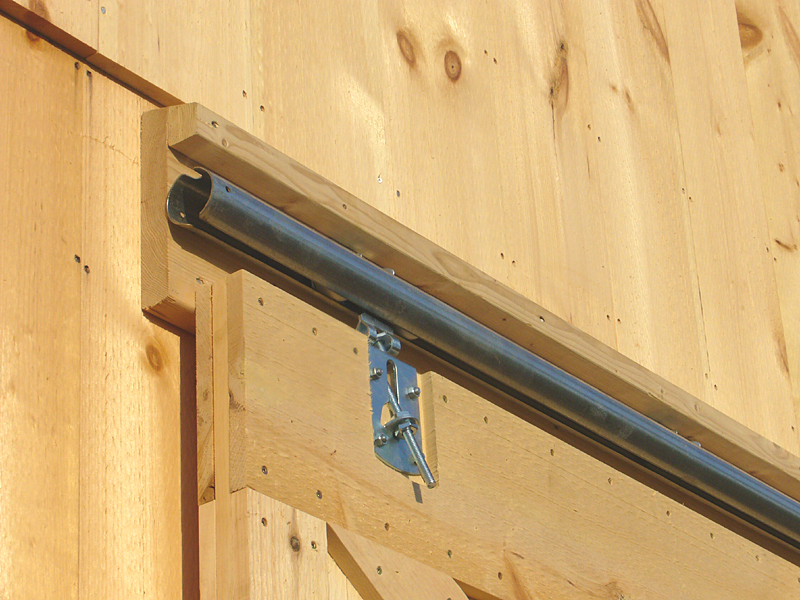
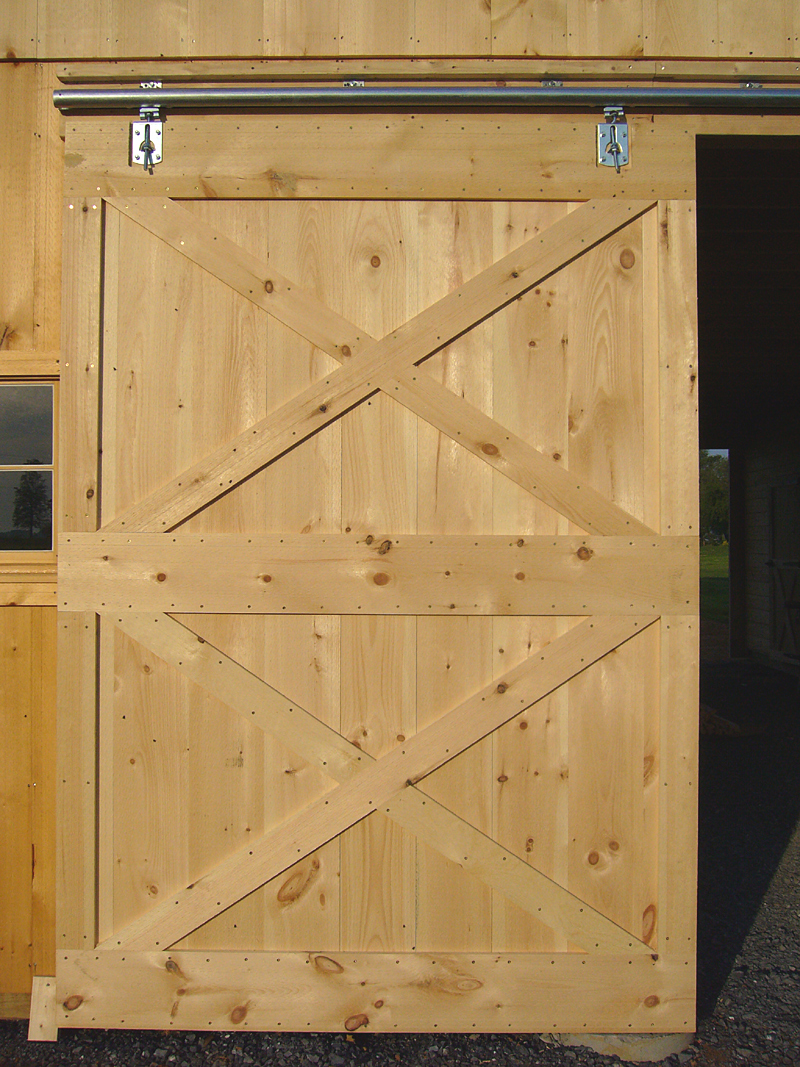
The best door system for a center aisle barn is a split slider (double sliding door) which is hung on rollers (trolleys) and slides on a track. What you need to remember when building this kind of door, is to make your door 6" wider than the width of your aisle. For example, if your center aisle is exactly 12' wide, your door must be 12'-6" wide (or each of your door panels would need to be 6'-3" wide). The reason you need to do this is to overlap your door opening 3" on each side. For your barn door hardware, we advise to use round track and rollers that have ball bearings. A good example is a Cannon Ball Hardware
Tools Needed
Small table saw, miter saw, screw gun, electric drill, square and two long pipe C-clamps.
Fasteners
All of the boards & trim would need to be fastened with screws. You will need to determine the length of the screws to use. The length will depend on the thickness of your boards.
Note: When working with cedar wood, it's recommended to use stainless steel fasteners.
Images of Sliding & Dutch Doors
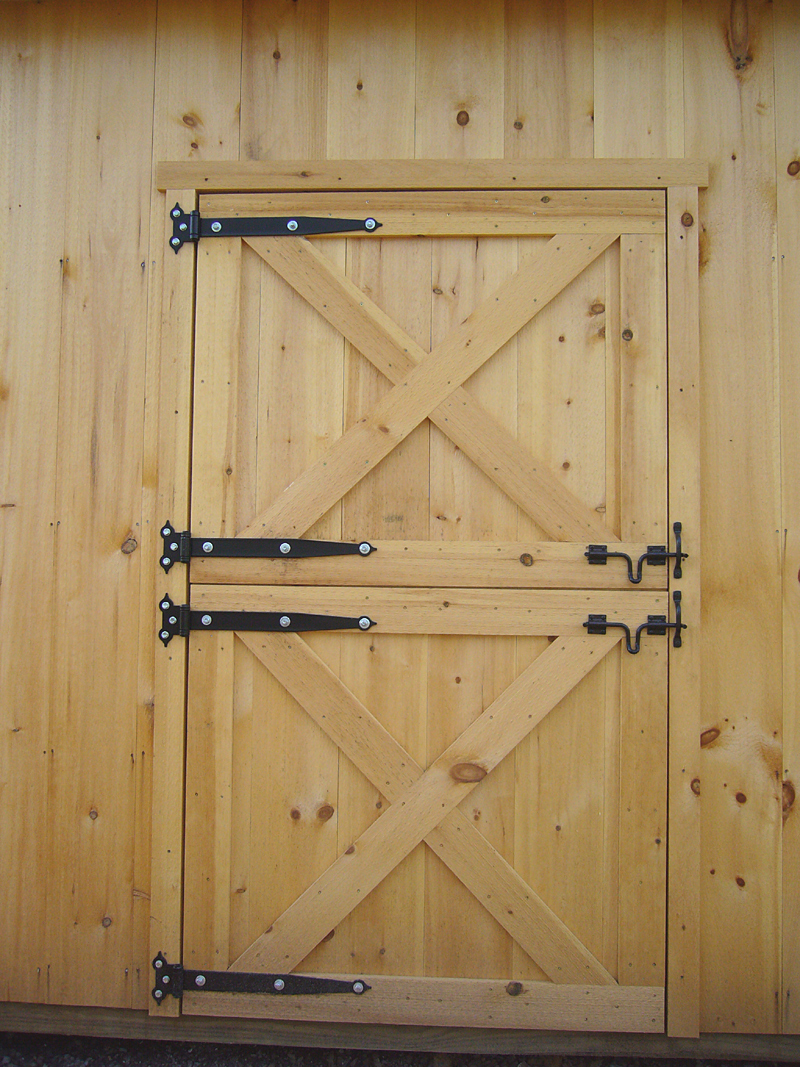
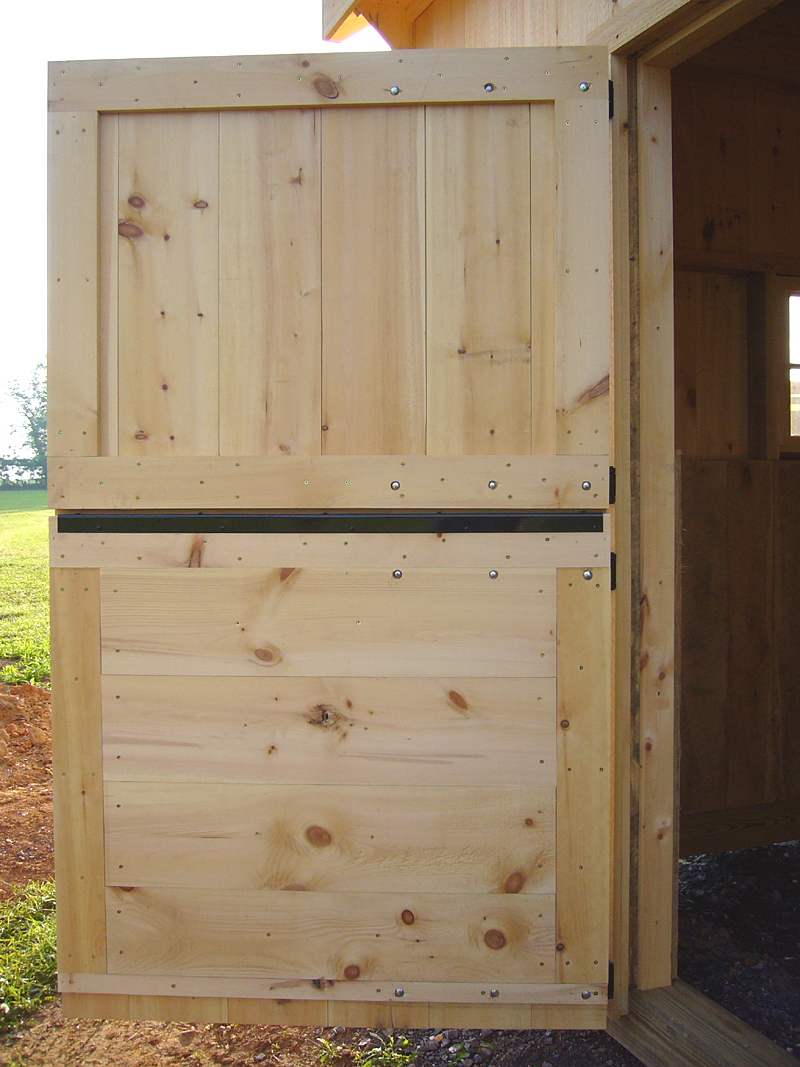
See How to Build Dutch Door page to learn about Dutch door construction.
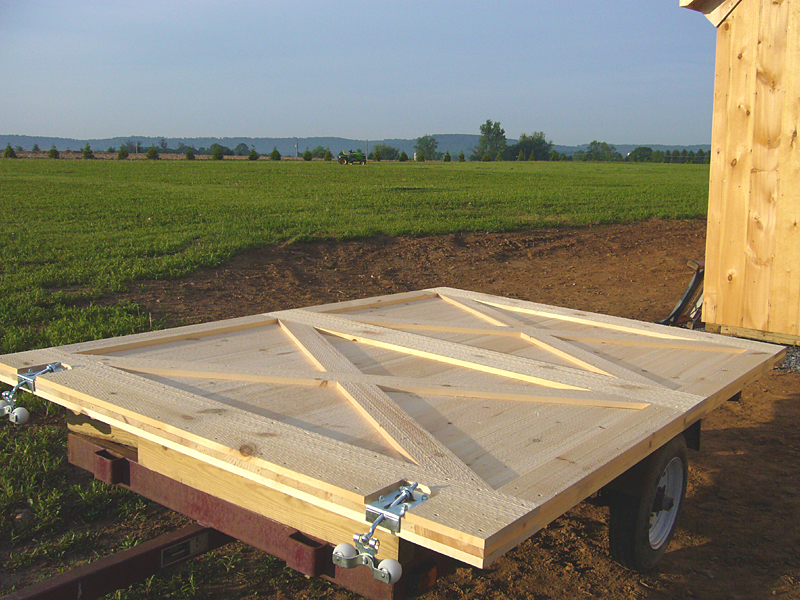
Building one 12'x8' Double Sliding Door
- Cut (18) 1x10x96" T&G boards. Take (2) of these boards and cut the groove off of each board (taking approximately 1/2" off) on one side only.
- Cut (12) 1x10x75" regular boards (not T&G)
- Prepare level flat surface and fasten (2) 2x4 boards making a temporary L-shape jig for your door Make one side of L 8' long and other 6.5' long. Make L shape jig perfectly square.
- Lay (8) 96" T&G boards in your jig starting with a board that has a groove cut off. Lay all of the boards with nice side up (or rough side up if using barn siding). This side will be the outside of your door when you are done. On the door, these are your vertical boards.
- Slightly tighten all of the boards with C-clamps
- Determine the width of the last T&G piece to build up the door to an exact 75" width
- Rip the last 1x10 T&G piece to right width, remove C-clamps, put the last ripped board in place and tighten again with C-clamps. Note: Do not over tighten your C-clamps
- Place (1) 1x10x75" horizontal straight edge board on each end of the door keeping it flush with all of the outside edges, and fasten the board with screws
- Fasten third 1x10x75" board in the center of the door
- Next, measure the distance between 1x10x75" boards and cut the Side Trim to fit. To make the Side Trim, rip 1x10 straight edge boards to 4-1/2" in width, cut to length and fasten with screws, keeping them flush with door edges. You will need (4) Side Trim pieces for each side of the door
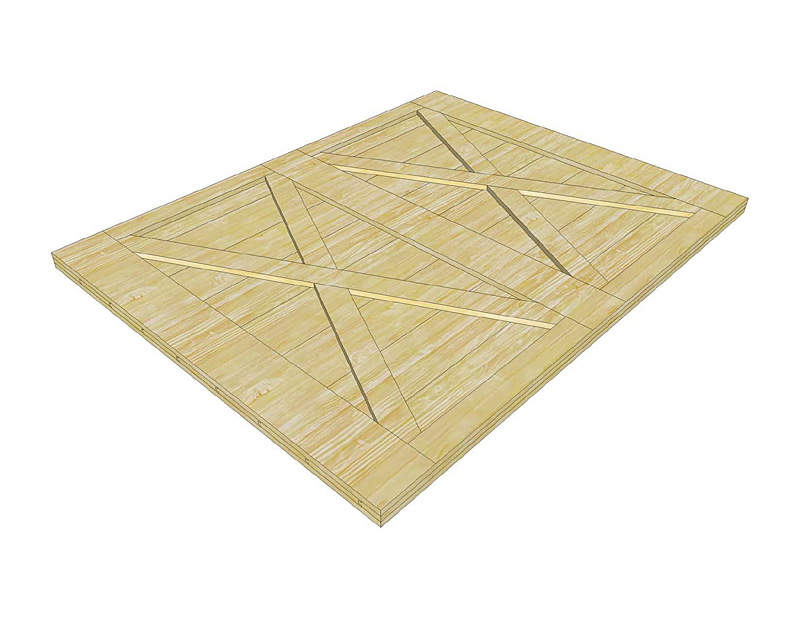
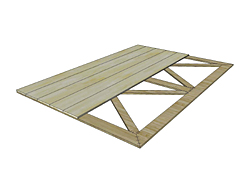
- Next step is to prepare your cross-bucks. This is probably the hardest part of the door to do. Cross-bucks should also be 4-1/2" wide and you will need to take time to determine the right angles and length of each cross-buck. Cut your cross-bucks and fasten them in place.
- The last step is to turn the door upside down and fasten (3) 1x10x75" boards and side trims on the other side (inside of the door). Do not fasten cross-bucks on this side. Note: it's important to fasten 1x10x75" boards & trim on both sides of the door in order to keep your door straight and to prevent the door from bending.
- Now, one half of your split sliding door is done. Do the other half the same way and your door will be ready to install.
Note: Step-by-step instruction given above may be used to construct Dutch doors, service doors, hayloft doors or any double swing-out doors. For small doors such as service & Dutch doors, the top and bottom trims don't need to be full 1x10 (you need full 1x10 trim only in the center of a Dutch door which will be ripped in half after door is hung).
Tip: Building a Nicer Looking Door
If you are trying to build fancier & nicer looking door, you can cut your outside trim boards at 45 degrees and fasten screws from the back, so no screws are exposed & visible from the outside (door face). This gives a door nice and clean look.